Social

onsdag den 19. oktober 2016

CustomScriptExtension in ARM Templates and Shared Access Signature (SAS) Tokens

I had some trouble with a custom script extension where the script required a SAS token to download some software. The token was simply truncated after the first '&'.

After some digging I thought I had to put the SAS token into quotes, and when looking into C:\Packages\Plugins\Microsoft.Compute.CustomScriptExtension\1.8\RuntimeSettings\0.settings I found that it was a sensible solution. I could also copy the "commandToExecute" and run it and get the expected result. In the variables section I added a:


  "variables": {
    "singlequote": "'",

And then put single quotes around the parameters('SASToken'). But no dice. The token was still getting truncated, this time with a 'in front...

So I decided to get rid of the '&', at least temporarily. base64 encoding to the rescue. And Luckily there is an ARM template function for just that. In the script I then added:

$SASToken = [System.Text.Encoding]::UTF8.GetString([System.Convert]::FromBase64String($SASToken))

Problem solved!

Seems to me that there is something odd in how the custom script extension calls PowerShell in this particular instance.

onsdag den 5. oktober 2016

Begin..Process..End and Error Handling

I had to wrap my mind around error handling and the begin..process..end function in PowerShell. It becomes really fun when I start throwing different ErrorActions after it!

This will be mostly some PowerShell snippets and their result. So without further ado, lets dive into some code!

This is a really simple function:

function myfunc
{
    [cmdletbinding()]
    param()

    begin
    {
        # some init code that throws an error
        try
        {
            throw 'some error'
            # code never reaches here
            Write-Output 'begin block'
        }
        catch [System.Exception]
        {
            Write-Error 'begin block'
        }
    }
    process
    {
        Write-Output 'process block'
    }
    end
    {
        Write-Output 'end block'
    }
}
Clear-Host
$VerbosePreference = "Continue"

Write-Host "-ErrorAction SilentlyContinue: the Write-Error in the begin block is suppressed" `
    -ForegroundColor Cyan
myfunc -ErrorAction SilentlyContinue
Write-Host "-ErrorAction Continue: displays the Write-Error in the begin block,
but the process and end block is executed" `
    -ForegroundColor Cyan
myfunc -ErrorAction Continue
Write-Host "-ErrorAction Stop: displays the Write-Error in the begin block. 
The Write-Error in the begin block becomes a terminating error. 
The process and end block is not executed" `
    -ForegroundColor Cyan
myfunc -ErrorAction Stop

The output is:


We see that for both ErrorActions Continue/SilentlyContinue that the process block is executed. When we use Stop then Write-Error becomes a terminating error and the pipeline is stopped.

Let us not dwell on that and move onto a function with some actual input:

# with input
function myfunc
{
    [cmdletbinding()]
    param(
        [Parameter(
            Position=0, 
            Mandatory=$true, 
            ValueFromPipeline=$true,
            ValueFromPipelineByPropertyName=$true)
        ]
        $x
    )

    begin
    {
        # No errors in the begin block this time
        Write-Output 'begin block'
    }
    process
    {
        if($x -gt 2)
        {
            Write-Error "$x is too big to handle!"
        }
        # echo input
        Write-Output $x
    }
    end
    {
        Write-Output 'end block'
    }
}
Clear-Host
$VerbosePreference = "Continue"

Write-Host "-ErrorAction SilentlyContinue: the Write-Error in the process block is suppressed" `
    -ForegroundColor Cyan
@(1,2,3) | myfunc -ErrorAction SilentlyContinue

Write-Host "-ErrorAction Continue: The Write-Error in the process block is displayed,
but `$x is still echoed" `
    -ForegroundColor Cyan
@(1,2,3) | myfunc -ErrorAction Continue

Write-Host "-ErrorAction Stop: The Write-Error in the process block becomes a terminating error, 
`$x > 2 is NOT echoed" `
    -ForegroundColor Cyan
@(1,2,3) | myfunc -ErrorAction Stop

The output is:


Now we see that something uninteded is happening for both ErrorActions Continue/SilentlyContinue. 3 is echoed still. With Stop the story is as before, Write-Error becomes a terminating error and 3 is not echoed.

Now we basically just add a return statement:

# with input
function myfunc
{
    [cmdletbinding()]
    param(
        [Parameter(
            Position=0, 
            Mandatory=$true, 
            ValueFromPipeline=$true,
            ValueFromPipelineByPropertyName=$true)
        ]
        $x
    )

    begin
    {
        # No errors in the begin block this time
        Write-Output 'begin block'
    }
    process
    {
        if($x -gt 2)
        {
            Write-Error "$x is too big to handle!"
            # continue on the pipeline. NOTE: continue does NOT continue but rather shuts down the pipeline completely
            return
        }
        # echo input
        Write-Output $x
    }
    end
    {
        Write-Output 'end block'
    }
}
Clear-Host
$VerbosePreference = "Continue"

Write-Host "-ErrorAction SilentlyContinue: the Write-Error in the process block is suppressed
(for both 3 and 4), and `$x > 2 is not echoed" `
    -ForegroundColor Cyan
@(1,2,3,4) | myfunc -ErrorAction SilentlyContinue

Write-Host "-ErrorAction Continue: The Write-Error in the process block is displayed
(twice, for both 3 and 4). `$x > 2 is not echoed" `
    -ForegroundColor Cyan
@(1,2,3,4) | myfunc -ErrorAction Continue
Write-Host 'The script keeps running' `
    -ForegroundColor Cyan

Write-Host "-ErrorAction Stop: The Write-Error in the process block becomes a terminating error,
'3' is NOT echoed. return is not exectuted hence the pipeline stops" `
    -ForegroundColor Cyan
@(1,2,3,4) | myfunc -ErrorAction Stop
Write-Host 'this is not reached' `
    -ForegroundColor Cyan

The output is:


We see that in all 3 cases that x greater than 2 is not echoed. Now ErrorAction Stop makes sense. We indicate that if the function fails for any input we do not wish to continue the script.

And we can add some error handling:

# with input
function myfunc
{
    [cmdletbinding()]
    param(
        [Parameter(
            Position=0, 
            Mandatory=$true, 
            ValueFromPipeline=$true,
            ValueFromPipelineByPropertyName=$true)
        ]
        $x
    )

    begin
    {
        # No errors in the begin block this time
        Write-Output 'begin block'
    }
    process
    {
        try
        {
            if($x -gt 2)
            {
                # this puts the error into the $Error variable
                throw "$x is too big to handle!"

            }
            # echo input
            Write-Output $x
            }
        catch [System.Exception]
        {
            Write-Error $Error[0].Exception
            Write-Verbose "continue on the pipeline '$x'"
            return
        }
        Write-Verbose "continue on the pipeline '$x'"
    }
    end
    {
        Write-Output 'end block'
    }
}
Clear-Host
$VerbosePreference = "Continue"

Write-Host "-ErrorAction SilentlyContinue: the Write-Error in the process block is suppressed 
(for both 3 and 4), and `$x is not echoed" `
    -ForegroundColor Cyan
@(1,2,3,4) | myfunc -ErrorAction SilentlyContinue

Write-Host "-ErrorAction Continue: The Write-Error in the process block is displayed 
(twice, for both 3 and 4).`$x is not echoed" `
    -ForegroundColor Cyan
@(1,2,3,4) | myfunc -ErrorAction Continue
Write-Host 'The script keeps running' `
    -ForegroundColor Cyan

Write-Host "-ErrorAction Stop: The Write-Error in the process block becomes a terminating error, 
'3' is NOT echoed. return is not exectuted and the pipeline stops" `
    -ForegroundColor Cyan
@(1,2,3,4) | myfunc -ErrorAction Stop
Write-Host 'this is not reached' `
    -ForegroundColor Cyan

The output is:


I hope this helps understanding how some of the begin..process..end function works with regards to errors and error handling. I know I will be returning to this from time and again :D


tirsdag den 4. oktober 2016

ARM Template Tip: Names

Naming resources in ARM templates can be quite lengthy. This is an example of naming a network interface:

"name": "[concat(parameters('vmNamePrefix'), '-', padLeft(copyIndex(1), 2, '0'), variables('nicPostfix'), '-', padLeft(copyIndex(1), 2, '0'))]",

And we have to reference this at a later point for the virtual machine resource. If we then change the name, we will have to remember to change this reference also.

What we can do is to define the name in the variables section like this:

    "nic": {
      "name": "[concat(parameters('vmNamePrefix'), '-', padLeft('{0}', 4, '0'), variables('nicPostfix'), '-', padLeft('{0}', 4, '0'))]"
    }

(I like to group variables). And then reference this variable in the resource like:

"name": "[replace(variables('nic').name, '{0}', string(copyIndex(1)))]",

What I have done is to make {0} a placeholder and then replace it with the result from copyIndex(). We now have a central location to change the name if needed with no need to update any resources.

Would be cool if we had a template function for formatting:

"name": "[format(variables('nic').name, copyIndex(1), '-nic')]"

It would take the string as input and then a variable number of additional arguments. Ex.


"nic": {
   "name": "concat(parameters('vmNamePrefix'), '0{0}', '{1}')]"
}

would become({0} is replaced with the result from copyIndex(1) and {1} replaced with -nic):

"VM01-nic"

And it could be made more advanced, perhaps leaning on the good ol' sprintf.

torsdag den 29. september 2016

Logging webhooks using Azure Functions and OMS Log Analytics

We recently discussed webhooks internally at work and the question popped on how to maintain and log the activity. Webhooks normally have a limited timespan (could be years though), and they should generally be kept a secret even if they are accompanied by a token that authorizes the caller.

What better way to log the webhook calls than using OMS Log Analytics? Once the data is logged there you have a plethora of options on what to do with it. Go ask my colleague Stanislav.

I also wanted to try out the fairly new Azure Functions, which acts as a relay to Log Analytics Data Collector API. The webhook itself comes from an Azure Automation runbook.

I documented the entire solution on Github, and you can find the repository here - it takes you from A to Z on how to setup the various moving parts in Azure. I hope you can find some inspiration on how to manage your webhooks.

mandag den 26. september 2016

Hello Azure Functions - Integrating with Github

I had a hard time finding out how to integrate a Github Repository into Azure functions, or rather what files and the structure to put in the repository so that Azure Functions would pick them up. A very basic setup follows.

This assumes an understanding of Github and Azure Functions. There are plenty of resources out there explaining that better than I can.

Github

Create a fresh repository and create a file, host.json, in the root:
{
 "functions" : [
  "HelloAzureFunctions"
 ],
 "id": "ed5d78e575e14f0481c899532d41f5c0"
}

Now create a folder called HelloAzureFunctions. Inside that create a file, function.json:

{
    "bindings": [
        {
            "type": "httpTrigger",
            "name": "req",
            "direction": "in",
            "methods": [ "get" ]
        },
        {
            "type": "http",
            "name": "res",
            "direction": "out"
        }
    ]
}

And in this case we will use PowerShell; we need a file called run.ps1:
$requestBody = Get-Content $req -Raw | ConvertFrom-Json
$name = $requestBody.name

if ($req_query_name) 
{
    $name = $req_query_name 
}

Out-File -Encoding Ascii -FilePath $res -inputObject "Hello, $name"
That is it! Commit to Github and go to your Azure Function app and integrate with the repository. The HelloAzureFunctions should appear as a function after a short while.

You can fork my repository if you like, https://github.com/spaelling/hello-azure-functions. There is also a a PowerShell script there that can be used for testing (you can just paste in the webhook URI in a browser if you rather like that).

Also keep your webhooks a secret. In the aforementioned script I show how to get the webhook URI from an Azure Key Vault.

fredag den 16. september 2016

Analyzing your bank statement using PowerBI

I wanted to figure out what we were spending our money on, but our bank is lacking behind when it comes to finance insight, so what better way than to use PowerBI?

First you need to export your bank statements into CSV. We have multiple accounts, so I just looked into the account that we use for everyday shopping (food, etc.). I had some trouble importing into PowerBI, so I imported the CSV data into Excel where you then have to select (all) the data and make it into a table (ctrl+t) before you can import it into PowerBI.

I had to sanitize the data; removing transfers from one account to another and purchases that should have been made on another account. If you spot something later simply remove the row in excel and import the file again.


You are now ready to create some reports based on the bank statement data. It should look something like this (if there is only a single row in the fields box it means that PowerBI was unable to make sense of the data):


Now check the box next to the Σ and then one of the other options and then click the pie-chart icon. My bank statement comes with category and sub-category for each entry. If you have some sort of categorisation, and checked that, then you will see something like this (without redactions):


Wow! Ok, you could do that in Excel also (I would spend hours how to figure this out in Excel though). It simply shows the distribution of purchases into each category. The big one is grocery-shopping, which is the primary purpose for this account.

Now comes the magic. Deselect the graph and then again click on the Σ, and whatever translates into an entry description and select the table icon. That is more or less just what we have in Excel, right?

Select one of the categories in the piechart and see what happens.


It now shows only the entries (summary of the amount) in the table that are related to the category that you selected. This is just the tip of the iceberg. PowerBI can do much more than that!

Finally you can figure out what your wife is spending all your money on ;)

How Awesome is Docker?

Fully configured Ubuntu server up and running in minutes? On Windows? Impossible you say? It is not!

Start by installing Docker. We will try to run the following Python code in the Docker container.


try:
    from slackclient import SlackClient
    #import os # we need this for the next line
    # print the environment variable we exported in Dockerfile
    print(os.environ.get('SOME_TOKEN'))
except Exception as e:
    print("Error when importing 'SlackClient'")
    print(repr(e))
else:
    print("Succes!!!'")    
finally:
    pass

Copy this snippet to a file and name it somecode.py. Create a file called Dockerfile and paste the following into it.

FROM ubuntu:latest
# update apt-get then install python3.5 and pip3
RUN apt-get -y update && apt-get install -y python3.5 && apt-get install -y python3-pip
# update pip3
RUN pip3 install --upgrade pip
# install python modulesslackclient
RUN pip3 install slackclient==1.0.0
# copy source files
COPY somecode.py /src/somecode.py
# export some tokens
ENV SOME_TOKEN='this is a token'
# run the bot
CMD ["python3.5", "/src/somecode.py"]

Then run these few lines of PowerShell.


cd $PSScriptRoot
# build the image (based on 'Dockerfile' in this folder) - ignore the security warning
docker build -t codebeaver/dockerisawesome --force-rm .
# run a container using the image we just created, --rm means we remove the container after it exists
docker run --rm codebeaver/dockerisawesome

It may take some time to download the Ubuntu base image (ca. 500mb).

I intentionally put in an error. We did not import the os library in the Python code. Uncomment import os and run the PowerShell code again. That was it. You can easily install additional Python libraries by editing the Dockerfile.

You can run the container in Azure and there are various services for running Docker containers for you.

søndag den 28. august 2016

How to Slack the Most in Life

What have you been doing this weekend? I have been slacking (don't tell my boss). Most people in IT have heard of Slack by now. If not, you should check it out.'

Slack is normally used for team collaboration, but I wanted to see if I could "be less busy" in my privatelife too. Just too many apps I cycle between to check if something is new; Feedly, YouTube, Facebook, LinkedIn, Huffingtong Post, Twitter to name a few.

For a private user you will most likely stay in the free tier. This means that you are limited to 10 apps/integrations. But as you will learn, you can get a long way with just a few apps.

So what I have done so far is create some channels.

  • general (default, can't leave it)
  • message
  • news
  • reminders
  • social
  • todo
  • youtube
The idea is to put stuff like email and other direct messages into the message channel. News is for, well news. Reminders is linked to my gmail calendar where I keep my private appointments and appointments for work that goes outside normal work hours. Social is for stuff like Facebook and Twitter. Todo is meant for keeping a todo-list, and finally the youtube channel is for my YouTube channel subscriptions.

Each channel will highligh if there is something new in them, and since I am the sole member on the team, I know it is an app or bot that has updated the channel.

So far I have been able to link my Gmail to the message channel using ifttt.com. This is one way, meaning I get notified of new email and can see the body of the email. I also would like my iMessages in there, but I have yet to find an integration that can do this. There are other integrations that I have not tried yet (I just dont use alot of messaging apps):
  • Skype
  • Facebook Messenger (LinkedIn messaging, etc.)
Facebook Messenger is not something I use alot, but sometimes. There is an integration through Smooch, but that seems to be limited to Facebook Pages (makes sense in a business perspective). Zapier (has loads of advanced Slack integrations) and looks also to target Pages.
It basically allows you to get messages send to a Facebook Page into Slack. And reply from Slack also.

For the news channel I have lots of RSS feeds. That is simply using an RSS app (there are 3 or so of those) and then adding configurations for each feed.
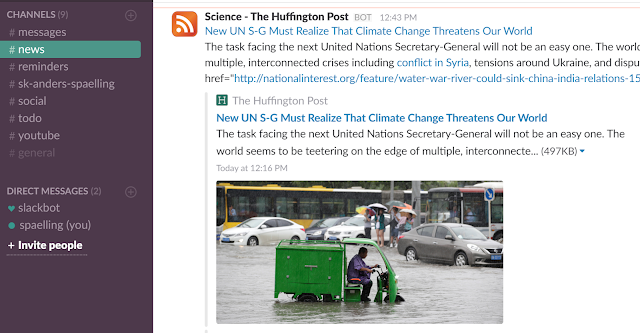
Some science news from Huffington Post
Now a little trick that I learned; There was no RSS feed for I fucking love science, so I resorted to https://twitrss.me/ as all (?) new articles are tweeted from the iflscience user. RSS feeds can sometimes be the answer when wanting to integrate something with Slack.
I have also connected slalert to the news channel. That is a more generic way to get news. I have yet to get something from Slalert, but then I have not put alot of keywords in it yet. It simply connects to a Slack webhook and whenever it finds something on the keywords you have given Slalert it will post it to the channel the webook is connected to. 

The reminders channel is currently linked to my Gmail calendar (there is an app called Google Calendar - doesn't get much easier than that). You can choose which of your calendars to sync to Slack and then how far in advance to remind you of an event.
You can also just tell the slackbot to remind you or someone else (or even a channel) of something.
Gotta keep hydrated


Resisting temptation to remind me again in 15 minutes :D
The social channel was supposed to cover me in Facebook, Twitter, and other social networks. It would be nice to be able to get the Facebook news feed in Slack, but Facebook closed down that part of the API in 2015. I guess it allowed people to get the essence of Facebook on a different platform than Facebook, removing their main source of income (advertisements).
I guess the story will be much the same, now or in the future, for other social networks, so I will not even try.

The todo channel was to function as a todo-list. I can use something like Slack posts (a file of sorts) and star them. Or pin them to the todo channel. It is possible to pin all kinds of items.

The youtube channel is for my YouTube subscriptions. I can get the feed of each subscribed YouTube channel and add them to my RSS app. I could not find a way to programatically add all of the subscribed channels, so abit of manual work was needed. And when I subscribe to a new channel I will have to add it here. I guess it is a matter of time before someone writes a YouTube app for Slack.

So have I really slackified my life? Not quite. But it is a step in the right direction. Slack is still pretty new, and as apps are developed specifically for some of the things I have had to hack abit to get working, things will get better and more feature-rich.
The focus is obviously on features that can be used by actual teams (and not the solo-slacker). And still, limited by what APIs are offered by the provider in the other end. They will not be willing to just fully let go and have users leave their platform entirely.

torsdag den 9. juni 2016

Filtering on NULL in SMLets

No time since I wrote about Service Manager. Something that comes back to haunt me from time to time is filtering on NULL. I always forget how, so now I will document it, once and for all!

A script speaks a thousand words:


1
2
3
4
5
6
7
$IRClass = Get-SCSMClass system.workitem.incident$
# get all IRs where the classification is not set
Get-SCSMObject -Class $IRClass -Filter "Classification -ISNULL"

# if we need to filter on a property from a class extension, specify that exact class
$MyClassExt = Get-SCSMClass incident.extension$
Get-SCSMObject -Class $MClassExt -Filter "CustomerProperty -ISNULL"

tirsdag den 24. maj 2016

Script for deploying Nano Server (TP5)

There are plenty of scripts around that helps deploying Nano server. But there seems to be issues between the various TPs, I had trouble with a script that worked for TP4 but not at all for TP5.

So I ended up creating my own. It should just run in one go, but I suggest you take a few lines at at time to sort out any issues.

The script as follows, and found on Technet gallery.


 1
 2
 3
 4
 5
 6
 7
 8
 9
10
11
12
13
14
15
16
17
18
19
20
21
22
23
24
25
26
27
28
29
30
31
32
33
34
35
36
37
38
39
40
41
42
43
44
45
46
47
48
49
50
51
52
53
54
55
56
57
58
59
60
61
62
63
64
65
66
67
68
69
70
71
72
73
74
75
76
77
78
79
80
81
82
83
84
85
86
87
88
89
90
91
92
93
94
95
96
97
98
# note this is written for Server 2016 TP5 - it probably doesn't work on other TPs

# create this folder and copy the NanoServerImageGenerator from the 2016 media
cd D:\NanoServer

Import-Module .\NanoServerImageGenerator\NanoServerImageGenerator.psm1


$BasePath = "D:\NanoServer"
$TargetPath = "$BasePath\Nano01.vhd"
$ComputerName = "Nano01"
$Password = ConvertTo-SecureString -AsPlainText -String "Password" -Force

$IPAddress = "192.168.0.42"
$GatewayAddress = "192.168.0.1"
$DNSAddresses = ('192.168.0.21','8.8.8.8')
$Ipv4SubnetMask = "255.255.255.0"

$Domain = 'my.domain'

$Parameters = @{
    DeploymentType = 'Guest'
    Edition = 'Datacenter'
    MediaPath = "E:\"
    BasePath = $BasePath
    TargetPath = $TargetPath
    ComputerName = $ComputerName
    AdministratorPassword = $Password
    Ipv4Address = $IPAddress
    Ipv4SubnetMask = $Ipv4SubnetMask
    Ipv4Gateway = $GatewayAddress
    Ipv4Dns = $DNSAddresses
    InterfaceNameOrIndex = "Ethernet"
}

New-NanoServerImage @Parameters -ErrorAction Stop

# credentials for the nano server
$User = "$IPAddress\Administrator"
$Credential = New-Object -TypeName System.Management.Automation.PSCredential -ArgumentList $User, $Password

# add it to trusted hosts
Set-Item WSMan:\localhost\Client\TrustedHosts -Value $IPAddress -Force -Concatenate

# size of the vhd - WOW!
[int]((Get-ChildItem -Path $TargetPath).Length / 1MB)

# can only install IIS and SCVMM offline
Find-NanoServerPackage *iis* | Install-NanoServerPackage -Culture 'en-us' -ToVhd $TargetPath -Verbose
Find-NanoServerPackage *scvmm* | Install-NanoServerPackage -Culture 'en-us' -ToVhd $TargetPath -Verbose

# create a new VM
$VMName = "Nano01"
New-VM -Name $VMName -MemoryStartupBytes 512MB -SwitchName MGMT -VHDPath $TargetPath -Generation 1 -Verbose

# and start it
Start-VM -Name $VMName

# we wait - first boot can be "slow" :D
Write-Verbose "waiting abit for VM to boot for the first time..."
Start-Sleep -Seconds 20

# need to run this with administrative priviliges in the domain
djoin.exe /provision /domain $Domain /machine $ComputerName /savefile .\"$ComputerName.txt"

# create session object
$Session = New-PSSession -ComputerName $IPAddress -Credential $Credential

# copy domain join blob file to nano server
Copy-Item -ToSession $Session -Path .\"$ComputerName.txt" -Destination "c:\"

# enter the session
Enter-PSSession -Session $Session

# domain join nano server
djoin /requestodj /loadfile c:\$env:COMPUTERNAME.txt /windowspath c:\windows /localos

# and do a restart
Restart-Computer

# wait for restart

# need to create a new session after it restarts - and we will use domain credentials
$User = "$Domain\Administrator"
$Password = ConvertTo-SecureString "domainadminpassword" -AsPlainText -Force
$Credential = New-Object -TypeName System.Management.Automation.PSCredential -ArgumentList $User, $Password

$Session = New-PSSession -ComputerName $IPAddress -Credential $Credential

# enter the session
Enter-PSSession -Session $Session

# install the nano server package provider

Install-PackageProvider NanoServerPackage
Import-PackageProvider NanoServerPackage

Find-NanoServerPackage

mandag den 2. maj 2016

Automated module installation to Azure Automation

Ever needed to install a bunch of modules to an Azure Automation Account? This script can do it for you. Only thing you need to do is point it at the ARM-template that deploys the module. These templates are easy to obtain by following the description in the script-file. A simple loop can install multiple modules (example on how in the file).

Get it while it's hot.

tirsdag den 26. april 2016

Generate ARM template parameter file

I find it tedious to create parameter files for my ARM templates. With the script I just wrote you don't have to.

Simply point at the ARM template that you need a parameter file for, and the function will spit out the json that matches. Pipe it to Out-File or "clip" to put it in your clipboard and paste it into Visual Studio or other ARM template editor of choice.

Go grab it here - remember to rate if you like it :D

Søg i denne blog